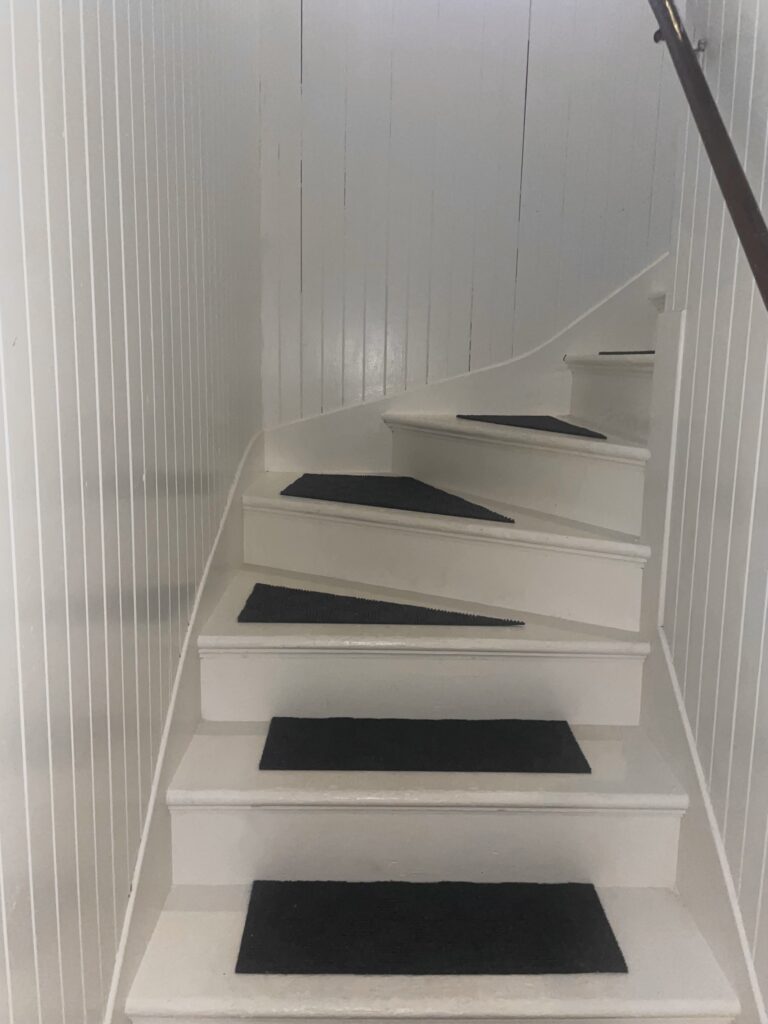
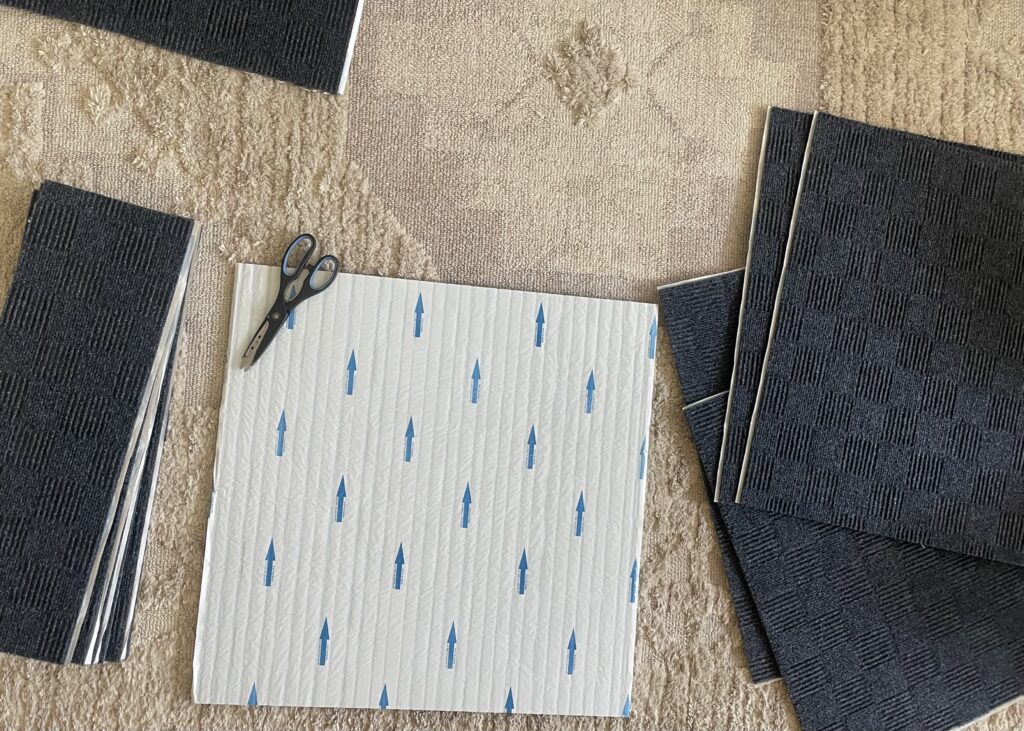
Welcome back, DIY friends! Today, I’ll take you through an innovative and budget-friendly way I transformed my staircase using self-adhesive carpet tiles. Whether you’re looking to add style, safety, or sound insulation to your stairs, this creative DIY project has got you covered. By cutting each carpet tile into three rectangles, I achieved a seamless and custom look for each stair tread. So, let’s dive into the step-by-step guide on how I made DIY stair tread carpets that elevated both the aesthetics and functionality of my staircase.

Materials Needed:
- Self-adhesive carpet tiles of your choice (ensure you have enough for each stair tread)
- Measuring tape
- Straight edge/ruler
- Utility knife or carpet cutter
- Cutting mat or protective surface
- Pencil or chalk
Step 1: Measuring and Planning Stair Tread Strips
I started by measuring the dimensions of each stair tread. I took note of the length and width of the area I wanted to cover with the carpet tiles. Since I planned to cut each square tile into three rectangles, I divided the width measurement by three to determine the width of each rectangle.

Step 2: Cutting the Carpet Tiles
I laid the first self-adhesive carpet tile on a cutting mat to protect my working surface. Using a straight edge or ruler, I marked the width measurement I obtained in Step 1 on the tile using a pencil. Ensuring the line was straight and accurate, I proceeded to carefully cut along the marked line using a utility knife, creating the first rectangle. I repeated this process for the other two rectangles. Safety was a priority during this step, so I exercised caution to avoid any accidents.
Step 3: Preparing the Stair Treads
Before applying the self-adhesive rectangles, I made sure the stair treads were clean and free from any dust or debris. I wiped them down and vacuumed to ensure the best adhesion possible.
Step 4: Applying the Carpet Rectangles
Peeling off the backing of the first carpet rectangle, I aligned it with the edge of the stair tread, making sure it was straight and evenly positioned. Slowly, I pressed down on the carpet to secure it in place, smoothing out any air bubbles or wrinkles as I went along.
I repeated this process for the other two rectangles, aligning them tightly next to each other to create a seamless appearance. If the carpet tile adhesive didn’t stick immediately to the surface, I applied a bit of extra pressure to ensure a strong bond.
Step 5: Getting Creative in Corners
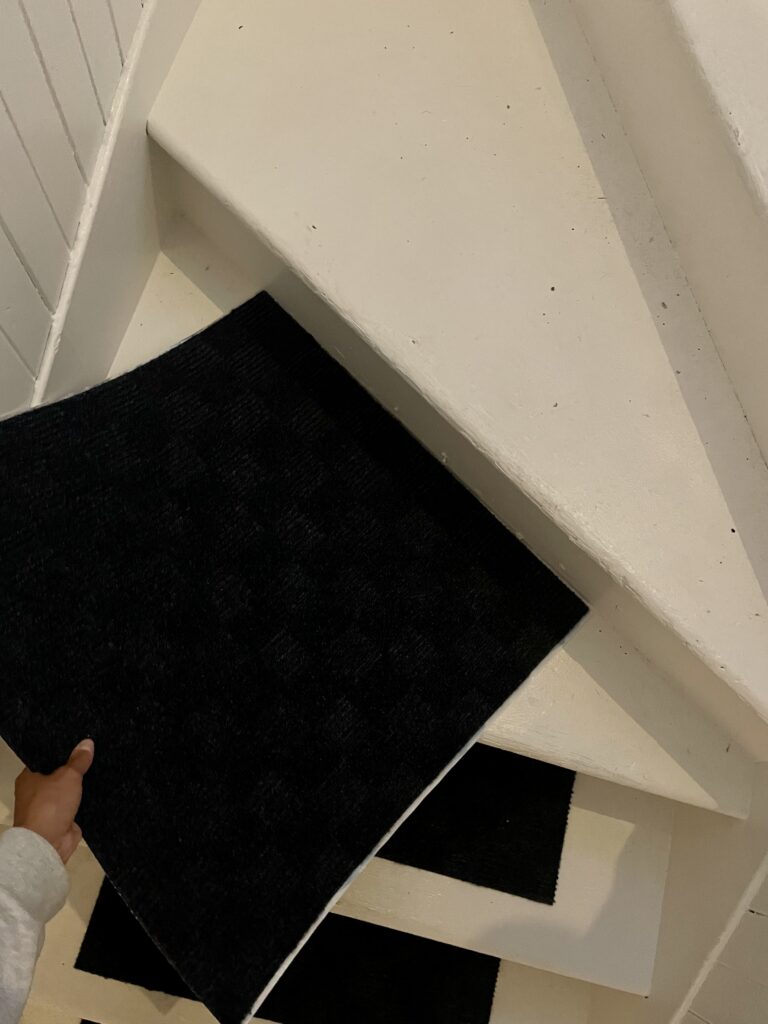
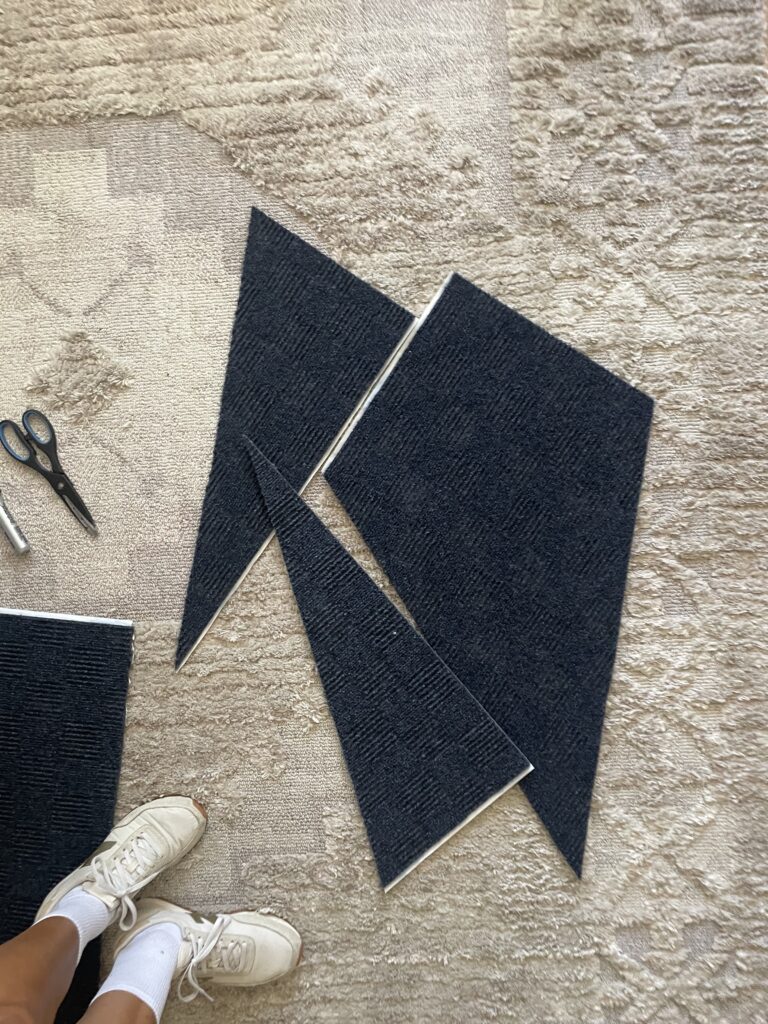
As I approached the corners of my staircase, I encountered a small challenge to ensure a seamless and polished look. To address this, I decided to get creative and cut the carpet tiles into triangular shapes for the three steps that went around the corner.
Here’s how I did it:


- Measure the Triangular Shape: To create a smooth transition around the corner, I measured the distance from the edge of the last full rectangle to the corner of the step. This measurement determined the base of the triangular shape.
- Mark and Cut: Using my measuring tape and pencil, I marked the base measurement on the carpet tile that would fit the triangular shape. I then drew a diagonal line from the top corner of the tile to the endpoint of the base measurement, creating the triangular shape.
- Trim and Place: With the shape marked, I carefully cut along the diagonal line using the utility knife, ensuring a clean and precise cut. Once the triangular shape was ready, I peeled off the backing and applied it to the step, fitting it snugly into the corner.
- Repeat for Other Steps: I repeated this process for the remaining two steps that went around the corner. Each triangular shape was customized to fit its respective step perfectly.
I successfully transformed my staircase with DIY stair tread carpets using self-adhesive carpet tiles. This simple yet effective project added a touch of comfort, style, and safety to this staircase while staying within my budget. I hope you enjoyed this tutorial and feel inspired to create your own cozy and inviting stair tread carpets. Happy DIYing!