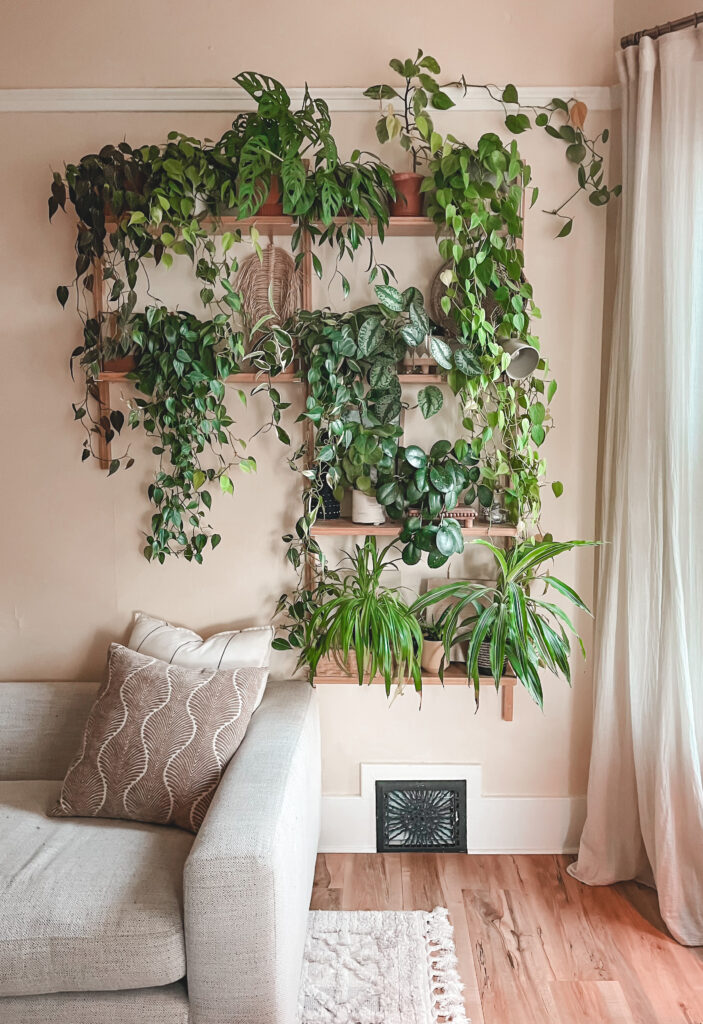
A plant wall turns a blank stretch above the sofa into a living, layered feature. I started with a custom mid century shelving unit. I cut it down to frame the sofa and built it to hold a full mix of trailing and statement plants. Here’s how I put it together, and how you can build your own version.
Start with the Shelving
Custom shelving gives a plant wall structure. I chose a mid century design and cut it to the exact width of my sofa, so the greenery frames the seating area instead of overwhelming the room.
A few things to consider when planning shelving for a plant wall:
- Give shelves enough depth to hold pots plus a little breathing space for growth.
- Vary the shelf heights to create movement. Trailing plants cascade at different lengths, which adds visual rhythm to the wall.
- Choose open-back or slatted designs to let light reach plants tucked toward the back.
- Pick wood tones like walnut or teak to bring warmth and pair naturally with green foliage.
Mount the shelving securely to wall studs. A fully planted wall carries real weight once soil and water fill every pot.
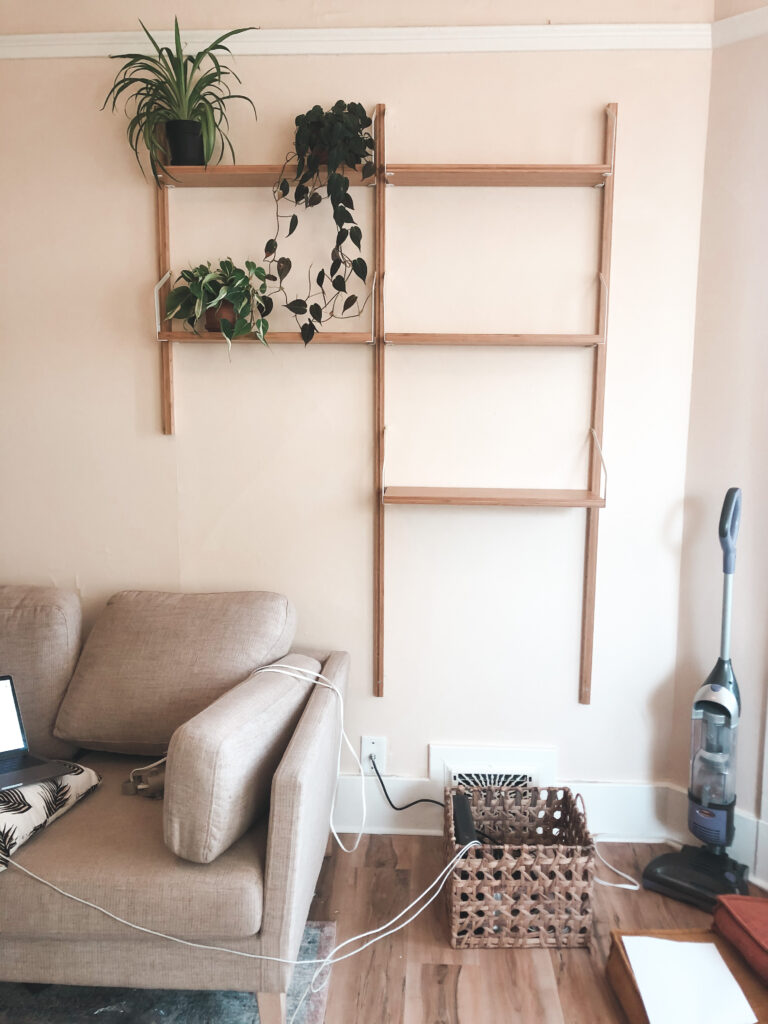
Choose a Mix of Trailing and Statement Plants
Combining plants with different growth habits makes a plant wall come alive. Trailing varieties soften the hard edges of the shelving, and statement plants anchor the design with bold texture.
Trailing plants I use:
- Pothos, in golden, marble queen, and satin varieties, for layered color and pattern
- Philodendron, for its classic heart-shaped leaves and easy cascade
- String of hearts, for delicate, thin vines that add a lighter touch
- Spider plants, for their arching leaves and easy-care nature
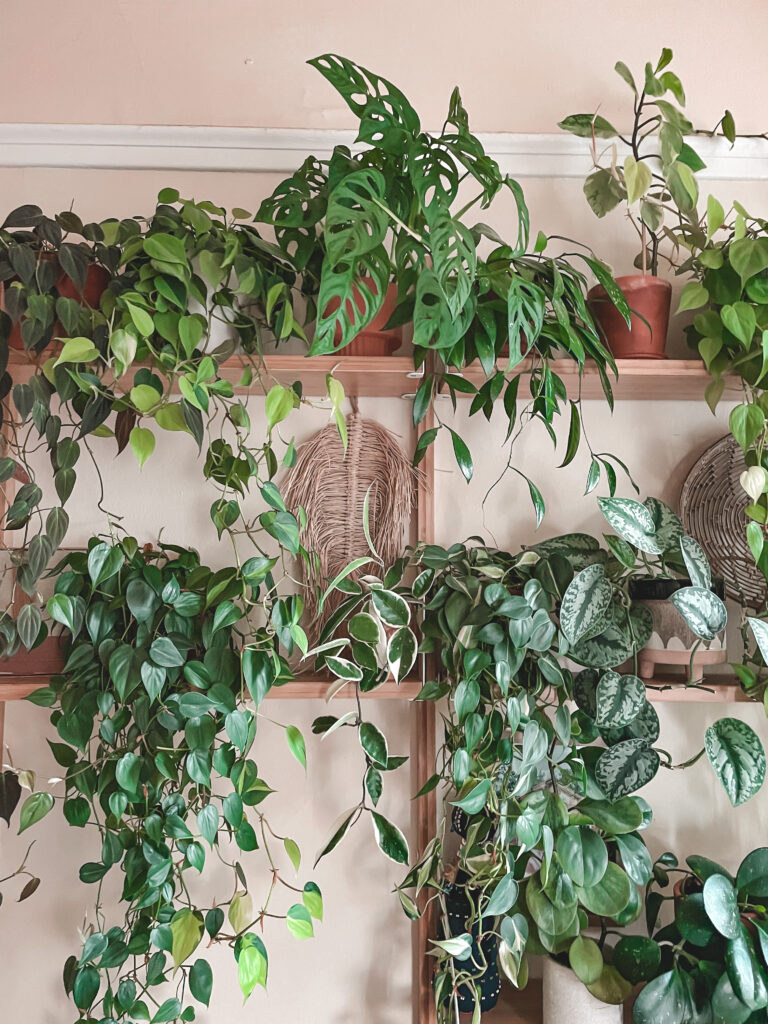
Statement plants I use:
- Monstera, for large, sculptural leaves that draw the eye
- Dracaena, for upright structure and bold variegation
- Ferns, for soft, textural fullness in the middle of the wall
Place statement plants at eye level and let trailing plants spill from the top and sides to build a balanced, gallery-like composition.
Build in Layers
Think of the wall in three layers, top to bottom.
The top shelf holds plants that thrive with the most light and room to trail, since they’re closest to the ceiling and often nearest a window or light source. The middle shelves hold a mix of statement and trailing plants, filling out the visual core of the wall. The bottom shelf works well for plants like spider plants and dracaena, which have a more upright, grounded shape and help the wall feel finished at the base.
This layered approach means the eye moves naturally from top to bottom, taking in the full range of textures and greens along the way.
Light and Placement
Position the shelving where it gets bright, indirect light for most of the day. A wall near a window works well, and sheer curtains help diffuse strong afternoon sun. Rotate individual plants occasionally so growth stays even across the wall.
Maintenance and Care
A full plant wall benefits from a simple care routine.
- Water on a rotating schedule, checking soil moisture shelf by shelf rather than watering everything on the same day.
- Wipe down larger leaves monthly to keep them dust-free and glossy.
- Trim trailing vines occasionally to encourage fuller, bushier growth.
- Rotate or swap plants seasonally as some varieties slow down or need more light in winter.
Growing Into Itself
A plant wall grows into itself over time. What starts as a shelf with small starter plants fills in month by month into a lush, cascading feature. Mine has become the focal point of the living room, framing the sofa with layers of green that change and grow with each season.
Building a plant wall takes planning, the right shelving, and a mix of plants suited to your light. Once it’s in place, it rewards you with a living piece of design that keeps evolving.